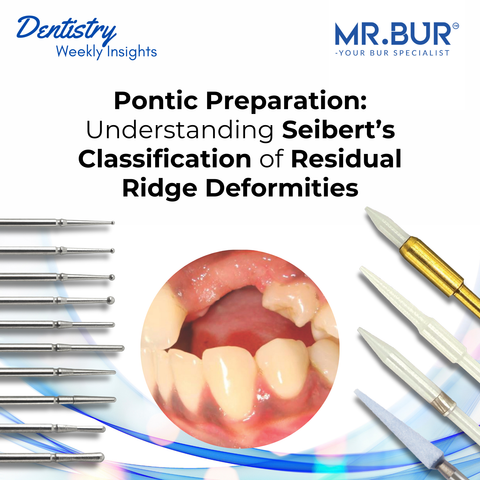
Pontik merupakan komponen penting dari gigi tiruan sebagian cekat, yang berperan penting dalam mengganti gigi yang hilang sekaligus memastikan fungsionalitas, estetika, dan kebersihan mulut. Membuat pontik yang dirancang dengan baik memerlukan keterampilan dan alat yang tepat. Panduan ini memberikan gambaran terperinci tentang teknik pembuatan pontik, yang menyoroti alat-alat penting dan praktik terbaik untuk mencapai hasil yang optimal.
Memahami Persyaratan Desain Pontic
Sebelum menyelami tekniknya, penting untuk memahami persyaratan mendasar untuk desain pontik:
-
Biologis : Pastikan permukaan jaringan dapat dibersihkan, sediakan akses ke gigi penyangga, dan hindari pemberian tekanan pada tulangan.
-
Estetika : Meniru penampilan gigi asli, menciptakan ilusi muncul dari gingiva, dan menyediakan ruang yang cukup untuk porselen atau komposit.
-
Mekanik : Pertahankan kekakuan, gunakan konektor yang kuat, dan pilih bahan yang tahan terhadap deformasi dan patah.
Teknik Membuat Pontik
1. Penilaian Pra-Perawatan
Pemeriksaan menyeluruh sangat penting untuk memastikan keberhasilan pembuatan pontik. Langkah-langkah utamanya meliputi:
-
Menilai ruang pontik : Pastikan ruang yang cukup untuk fabrikasi yang tepat dengan menangani kemiringan atau pergeseran gigi yang berdekatan.
-
Mengevaluasi kontur punggungan sisa : Klasifikasikan cacat punggungan menggunakan klasifikasi Siebert dan tentukan apakah diperlukan penambahan atau pembentukan ulang.
-
Perencanaan zona estetika : Gunakan penyelarasan ortodontik, modifikasi gigi penyangga, atau waxing diagnostik jika diperlukan.
2. Kontur dan Persiapan Punggungan
-
Pembentukan Jaringan Lunak:
-
Untuk pontik lonjong, buatlah cekungan jaringan lunak menggunakan bur pemangkasan jaringan lunak seperti Mr. Bur Soft Tissue Trimming Ceramic Powder Bur FG atau Mr. Bur Ceramic Bur For Soft Tissue Trimming Bur FG .
-
Pertahankan arsitektur gingiva dengan mengkondisikan soket ekstraksi atau melakukan penambahan tulangan.
-
Augmentasi Jaringan Keras:
-
Gunakan bahan alograf (misalnya, hidroksiapatit) untuk peningkatan tulang rawan jika diperlukan.
3. Pemilihan dan Desain Pontik
-
Pontik Sanitasi atau Higienis:
-
Ideal untuk daerah posterior dengan persyaratan estetika minimal.
-
Memerlukan peralatan seperti bur kontur mahkota dan bur ramah jaringan untuk pembentukan yang presisi.
-
Kit yang Direkomendasikan: Kit Persiapan Mahkota & Jembatan FG
-
Pontic Ridge Lap yang dimodifikasi:
-
Paling cocok untuk area dengan visibilitas tinggi seperti gigi anterior.
-
Gunakan alat pembentuk porselen untuk memperbaiki kontur wajah sambil mempertahankan kontak jaringan berbentuk T.
-
Pontik Ovat:
-
Untuk estetika yang unggul, pahat permukaan jaringan cembung dengan bur finishing .
-
Kunjungi: Koleksi Bur Finishing Mr. Bur
4. Teknik Pembuatan
-
Pontik yang dibuat khusus:
-
Gunakan sistem CAD/CAM untuk presisi dalam mendesain dan menggiling pontik.
-
Gunakan blok keramik dan zirkonia untuk hasil yang estetis dan tahan lama.
-
Pontik Prefabrikasi:
-
Memanfaatkan pontik porselen yang tersedia secara komersial yang dapat disesuaikan menggunakan bur berlian berkecepatan tinggi.
-
Pilihannya meliputi trupontik, pelapis pin, dan pelapis porselen yang menyatu dengan logam.
5. Poles dan Finishing
-
Ratakan semua permukaan menggunakan pemoles keramik untuk menghilangkan tepi kasar dan meningkatkan kompatibilitas jaringan.
-
Dapatkan hasil akhir yang sangat mengilap dengan Composite Polishing Diamond Polisher .
Pembuatan pontik adalah proses yang sangat teliti yang membutuhkan keseimbangan antara estetika, fungsionalitas, dan kebersihan. Dengan memanfaatkan peralatan dan teknik yang tepat, dokter gigi profesional dapat memberikan restorasi yang meningkatkan kepuasan pasien dan kesehatan mulut. Baik menggunakan sistem CAD/CAM canggih atau metode tradisional, perhatian terhadap detail adalah landasan keberhasilan pembuatan pontik.
Jika Anda seorang profesional gigi yang mencari peralatan andal untuk pembuatan pontik, jelajahi berbagai solusi inovatif dari Mr. Bur , yang dirancang untuk presisi dan kualitas dalam setiap prosedur.
Diamond Burs , Carbide Burs , Surgical & Lab Use Burs , Endodontic Burs , IPR Kit , Crown Cutting Kit , Gingivectomy Kit , Root Planning Kit , Orthodontic Kit , Composite Polishers , High Speed Burs , Low Speed Burs


