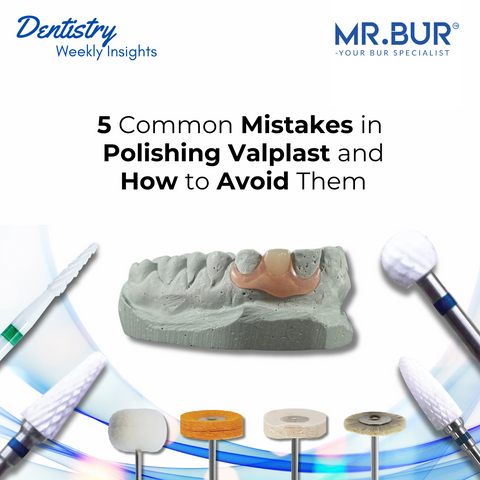
Gigi tiruan sebagian fleksibel Valplast telah merevolusi prostodontik lepasan dengan menawarkan kenyamanan, estetika, dan fleksibilitas yang tak tertandingi. Namun, penyesuaian yang tidak tepat dapat menyebabkan titik-titik tekanan terlokalisasi , yang menyebabkan ketidaknyamanan pasien, titik-titik nyeri, dan iritasi jaringan jangka panjang . Bagi teknisi gigi, mengetahui cara mengidentifikasi, menyesuaikan, dan memperbaiki titik-titik tekanan ini secara efektif akan memastikan kecocokan yang tepat dan kepuasan pasien.
Dalam panduan ini, kami akan membahas praktik terbaik untuk mengurangi titik-titik tekanan pada gigi tiruan fleksibel Valplast sambil menjaga integritas, kekuatan, dan estetika alat tersebut.
1. Mengidentifikasi Titik Tekanan pada Gigi Palsu Fleksibel Valplast
Tanda-tanda Umum Titik-titik Tekanan:
-
Keluhan pasien berupa nyeri atau iritasi lokal.
-
Terlihat kemerahan atau bintik-bintik nyeri pada area yang terkena.
-
Area pada jaringan lunak yang memucat secara berlebihan.
-
Kontak yang tidak merata antara jaringan parsial dan jaringan pendukung.
Teknik untuk Mendeteksi Titik Tekanan:
-
Pasta penunjuk tekanan (PIP): Oleskan lapisan tipis pada sisi jaringan Valplast parsial dan letakkan pada model atau intraoral. Area tempat pasta dipindahkan menunjukkan zona bertekanan tinggi.
-
Pemeriksa kecocokan silikon: Materi ini mengungkap perbedaan dalam adaptasi dan membantu menentukan area penyesuaian.
-
Umpan balik klinis dari dokter gigi: Selalu minta deskripsi terperinci mengenai area ketidaknyamanan dari dokter yang meresepkan.
2. Menyesuaikan Valplast Tanpa Mengurangi Kesesuaian atau Kekuatan
Alat Terbaik untuk Menyesuaikan Valplast:
-
Pemangkas Keramik Mr. Bur untuk Valplast : Memastikan penyesuaian yang tepat tanpa terlalu panas.
-
Bur laboratorium karbida tungsten berpasir halus : Ideal untuk penyesuaian terkendali dan pemurnian area bertekanan berlebihan.
Bur yang direkomendasikan: Mr Bur Tungsten Carbide Fine Cross Cut Laboratory Bur TC35F
-
Instrumen pemoles panas: Digunakan untuk modifikasi kecil tanpa menimbulkan kekasaran permukaan.
Langkah Penyesuaian:
-
Tandai titik-titik tekanan dengan pensil atau PIP sebelum penyesuaian.
-
Gunakan Pemangkas Keramik Mr. Bur untuk Valplast untuk melakukan pengurangan massal awal.
-
Gunakan Bur Laboratorium Tungsten Carbide Fine Cross Cut Mr. Bur TC35F untuk pengurangan area kontak tinggi yang presisi dan terkontrol.
-
Poles dan haluskan permukaan yang telah disesuaikan dengan alat poles gigi palsu yang lembut dan fleksibel (misalnya, alat poles Mr. Bur HP Valplast ).
-
Verifikasi kecocokan menggunakan pemeriksa kecocokan atau PIP untuk mengonfirmasi distribusi tekanan yang merata.
-
Bersihkan sebagian dengan uap untuk menghilangkan sisa material sebelum pengiriman.
3. Memperbaiki Kontak Jaringan untuk Kenyamanan Pemakaian
Hal yang boleh dan tidak boleh dilakukan:
✔ Lakukan: Gunakan tekanan yang ringan dan terkendali saat melakukan penyesuaian guna menghindari terkikisnya material secara berlebihan.
✔ Lakukan: Pertahankan tekstur permukaan yang rata untuk mencegah iritasi.
✔ Lakukan: Gunakan pembersih ultrasonik setelah penyesuaian untuk menghilangkan kotoran mikro.
❌ Jangan: Melakukan penyesuaian berlebihan, karena ini dapat melemahkan struktur Valplast parsial.
❌ Jangan: Gunakan batu apung pemoles tradisional, karena dapat membuat permukaan menjadi kasar dan tidak nyaman bagi pasien.
Finishing dan Poles:
-
Gunakan pemoles Mr. Bur HP Valplast untuk mengembalikan hasil akhir yang halus setelah penyesuaian.
-
Poles dengan kompon pemoles khusus Valplast (misalnya, Tripoli atau Valplast Shine) untuk mendapatkan permukaan yang sangat mengilap.
4. Mengomunikasikan Penyesuaian dengan Dokter Gigi
-
Area penyesuaian dokumen menggunakan foto atau pindaian digital untuk pencatatan yang akurat.
-
Berikan dokter gigi catatan terperinci tentang modifikasi yang dibuat dan perawatan pasca-penyesuaian yang direkomendasikan untuk pasien.
-
Berikan edukasi kepada dokter mengenai teknik adaptasi pasien yang tepat , termasuk jadwal pemakaian bertahap untuk memungkinkan jaringan lunak menyesuaikan diri.
Mengurangi titik-titik tekanan pada gigi tiruan Valplast yang fleksibel sangat penting untuk memastikan kenyamanan, kesesuaian, dan daya tahan jangka panjang . Dengan menggunakan teknik penyesuaian yang tepat, peralatan khusus, dan proses penyelesaian yang cermat , teknisi gigi dapat secara efektif menghilangkan titik-titik nyeri sambil mempertahankan integritas struktural alat . Menggabungkan pemoles Mr. Bur HP Valplast dan bur laboratorium tungsten karbida grit halus ke dalam alur kerja Anda akan membantu mencapai hasil yang konsisten dan ramah pasien .
Untuk hasil terbaik, selalu bekerja sama dengan dokter gigi dan dorong pasien untuk memberikan masukan guna menyempurnakan penyesuaian. Gigi palsu Valplast yang pas berarti pasien lebih bahagia dan lebih sedikit yang harus dibuat ulang!
Diamond Burs , Carbide Burs , Surgical & Lab Use Burs , Endodontic Burs , IPR Kit , Crown Cutting Kit , Gingivectomy Kit , Root Planning Kit , Orthodontic Kit , Composite Polishers , High Speed Burs , Low Speed Burs


