-
What tools should I prioritize for safe and efficient debonding?
Invest in high-quality, precision-engineered burs and polishers specifically designed for orthodontic procedures.
-
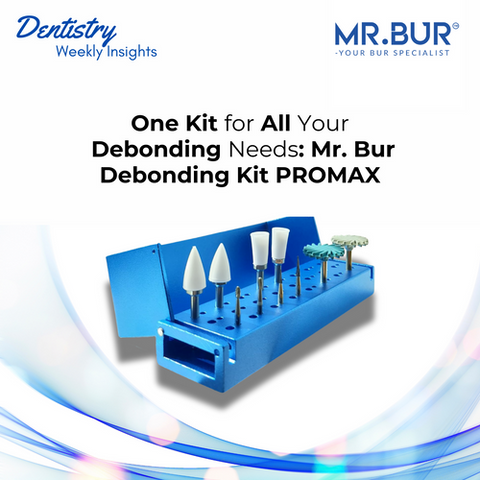
A comprehensive kit like the Mr. Bur Debonding Kit PROMAX is recommended for covering all stages of debonding in one set.
-
Use egg-shaped carbide burs (7404, 7404UF) for anterior adhesive removal and pointed cone carbide burs (7611, 7612) for posterior areas.
-
Include diamond polishers (CP1 & CP3) to restore enamel smoothness and shine.
-
How can I minimize the risk of enamel damage during debonding?
-
Always use debonding burs with a non-aggressive cutting action, such as carbide burs with precise flutes.
-
Apply light pressure and maintain proper angulation to avoid excessive enamel contact.
-
Finish with polishers to refine the surface and reduce micro-scratches.
-
Tools like the 2U09 Flame Polisher help safely remove scars without enamel scratching.
-
How should I manage stubborn adhesive residue effectively?
-
Begin with pointed cone carbide burs (7611, 7612) to remove bulk adhesive material.
-
Transition to egg-shaped finishing carbide burs (7404UF) for detailed cleanup.
-
Inspect under proper lighting to identify remaining adhesive and complete removal with polishers.
-
What is the best method to check for residual adhesive or scars?
-
Dry the teeth with air and examine under a bright light or magnification.
-
Residual adhesive will appear as a dull or uneven area.
-
Use tactile feedback with an explorer to detect rough patches.
-
Tools like the 2U09 Flame and Cup Polishers can be employed to remove scars effectively.
-
Is polishing necessary after adhesive removal?
Polishing is crucial to restore enamel to its pre-treatment state.
-
Start with a coarse grit polisher (CP1) to smooth the enamel surface.
-
Follow with a fine grit polisher (CP3)to achieve a high-gloss finish.
-
This two-step process improves aesthetics, reduces plaque retention, and enhances patient satisfaction.
-
How can I reduce chair time during debonding without compromising quality?
-
Avoid cheap, low-performance, or overly worn debonding burs to remove Ortho brackets, as they can increase chair time and risk enamel damage.
-
Regularly inspect and replace burs to ensure optimal performance.
-
Train your team for smooth transitions between tools and steps to maintain speed and quality.
-
How should I handle patients with sensitive teeth during debonding?
-
Use tools that generate minimal heat, with a gentle cutting action.
-
Avoid prolonged contact with the same area.
-
Consider applying a desensitizing agent before or after the procedure.
-
CP1 and CP3 diamond polishers are excellent for reducing sensitivity during polishing.
-
What are the risks of leaving adhesive or scars behind, and how can I avoid them?
-
Residual adhesive can lead to rough surfaces, plaque buildup, and increased risk of decay.
-
Use proper lighting and magnification to ensure all adhesive is removed.
-
Tools like the 2U09 Flame Polisher can effectively remove scars, leaving a smooth enamel surface ready for polishing.
-
Conduct a final inspection to confirm no adhesive or scars remain.
-
Why carbide bur instead of diamond bur in Mr. Bur Debonding Kit PROMAX? (Insights from Orthodontic Studies)
A study by Ghaleb et al. demonstrated that tungsten carbide burs are superior for orthodontic debonding, producing the least enamel roughness compared to sof-lex discs and diamond burs. This finding highlights their ability to preserve enamel integrity while ensuring efficient adhesive removal. Further study also supported this by showcasing how precision tools, such as carbide burs, significantly reduce bracket fractures and enamel damage. Mr. Bur Debonding Kit PROMAX, which includes egg-shaped and pointed cone carbide burs, leverages these advantages to streamline debonding procedures, protect enamel, and enhance clinical efficiency.
At MR.BUR CANADA, we pride ourselves on exceeding expectations and continually improving to meet the evolving needs of our customers.
Diamond Burs, Carbide Burs, Surgical & Lab Use Burs, Endodontic burs, IPR Kit, Crown Cutting Kit, Gingivectomy Kit, Root Planning Kit, Orthodontic Kit, Composite Polishers, High Speed Burs, Low Speed Burs
Subscribe our newsletter now!


